
Moodboard Monday: Gallery Gloss
The creative process begins with a spark of inspiration, an idea, a mood.
Moodboard Monday celebrates that moment when exploration begins to shape creative direction. Each week, we’ll break down a visual concept and share the tools and techniques used to bring it to life.
This week, we're featuring the moodboard that guided the look and feel of our latest Stable Video 4D 2.0 release. We developed a visual style called Gallery Gloss, inspired by soft plastics, collectible toy design, and characters posed in clear display cases. These references helped establish a consistent creative direction across the project, grounding early experimentation in a clear visual language.
We formed the style through image-to-image generation using Stable Image Ultra. Each new output inherited structural elements, lighting, and perspective from the one before it. This continuity is what contributed to a consistent visual style, even as the subject matter changed.
Below, we break down the steps we took and share tips on how to apply a similar approach to your own work.
Step 1: Begin with a focused subject
We began with a simple subject: a frog. The prompt included no background or lighting, focusing solely on generating the subject. The goal was to create something that felt soft, synthetic, and toy-like.

Prompt: “a smiling frog, inflatable, filled with air, vinyl texture, fun, rendered, smooth, shiny, rubbery surface, colors are pastel green, purple, pink, and white.”To push it further, we focused on material and form. We didn’t introduce a setting yet, but we wanted the frog to feel like a designed object instead of a floating concept.

Prompt: “a stylized inflatable frog, pastel green with a gradient belly, shiny smooth vinyl texture, large expressive eyes, rounded seams, reflective surface, sculpted cartoon proportions, sitting upright with legs spread, isolated on a neutral background, studio lighting, 3D rendered.”Step 2: Add structure with an acrylic display case
Introducing a transparent acrylic cube as a framing element brought the composition into focus. It provided structure and spatial logic, making the outputs more consistent and visually coherent.


Prompt: “a clear acrylic display case showcasing a colorful inflatable frog, pastel green, and light purple to light blue gradient belly, reflective smooth air-blown texture, rounded vinyl forms with sealed seams. The frog has large expressive eyes, some subtle 90s-styled geometric patterns. The figure stands confidently with spaced legs, clean background, soft glow lighting from above, studio environment, aesthetic toy photography feel. The scene is rendered in a sharp, clean 3D style with focus on lighting, details of the figure, and its vivid colors.”
Step 3: Turn the prompt into a repeatable format
At this stage, the prompt became a flexible structure. While the subject varied, the case, lighting, and framing remained constant. This modular approach allowed us to explore new content while maintaining a coherent visual style.
Template prompt: “a clear acrylic display case showcasing [subject], [description of pose or expression], [material or texture details], illuminated from above by soft lighting. The background is minimal and dark, the case rests on a black pedestal, and the environment mimics high-end product photography. The scene is rendered in a sharp 3D style with a focus on clean lines, reflections, and dramatic lighting.”
You can slot almost anything into this format. Next, we tested it with a new subject: a ballerina.
Step 4: Swap in a new subject, maintain the environment
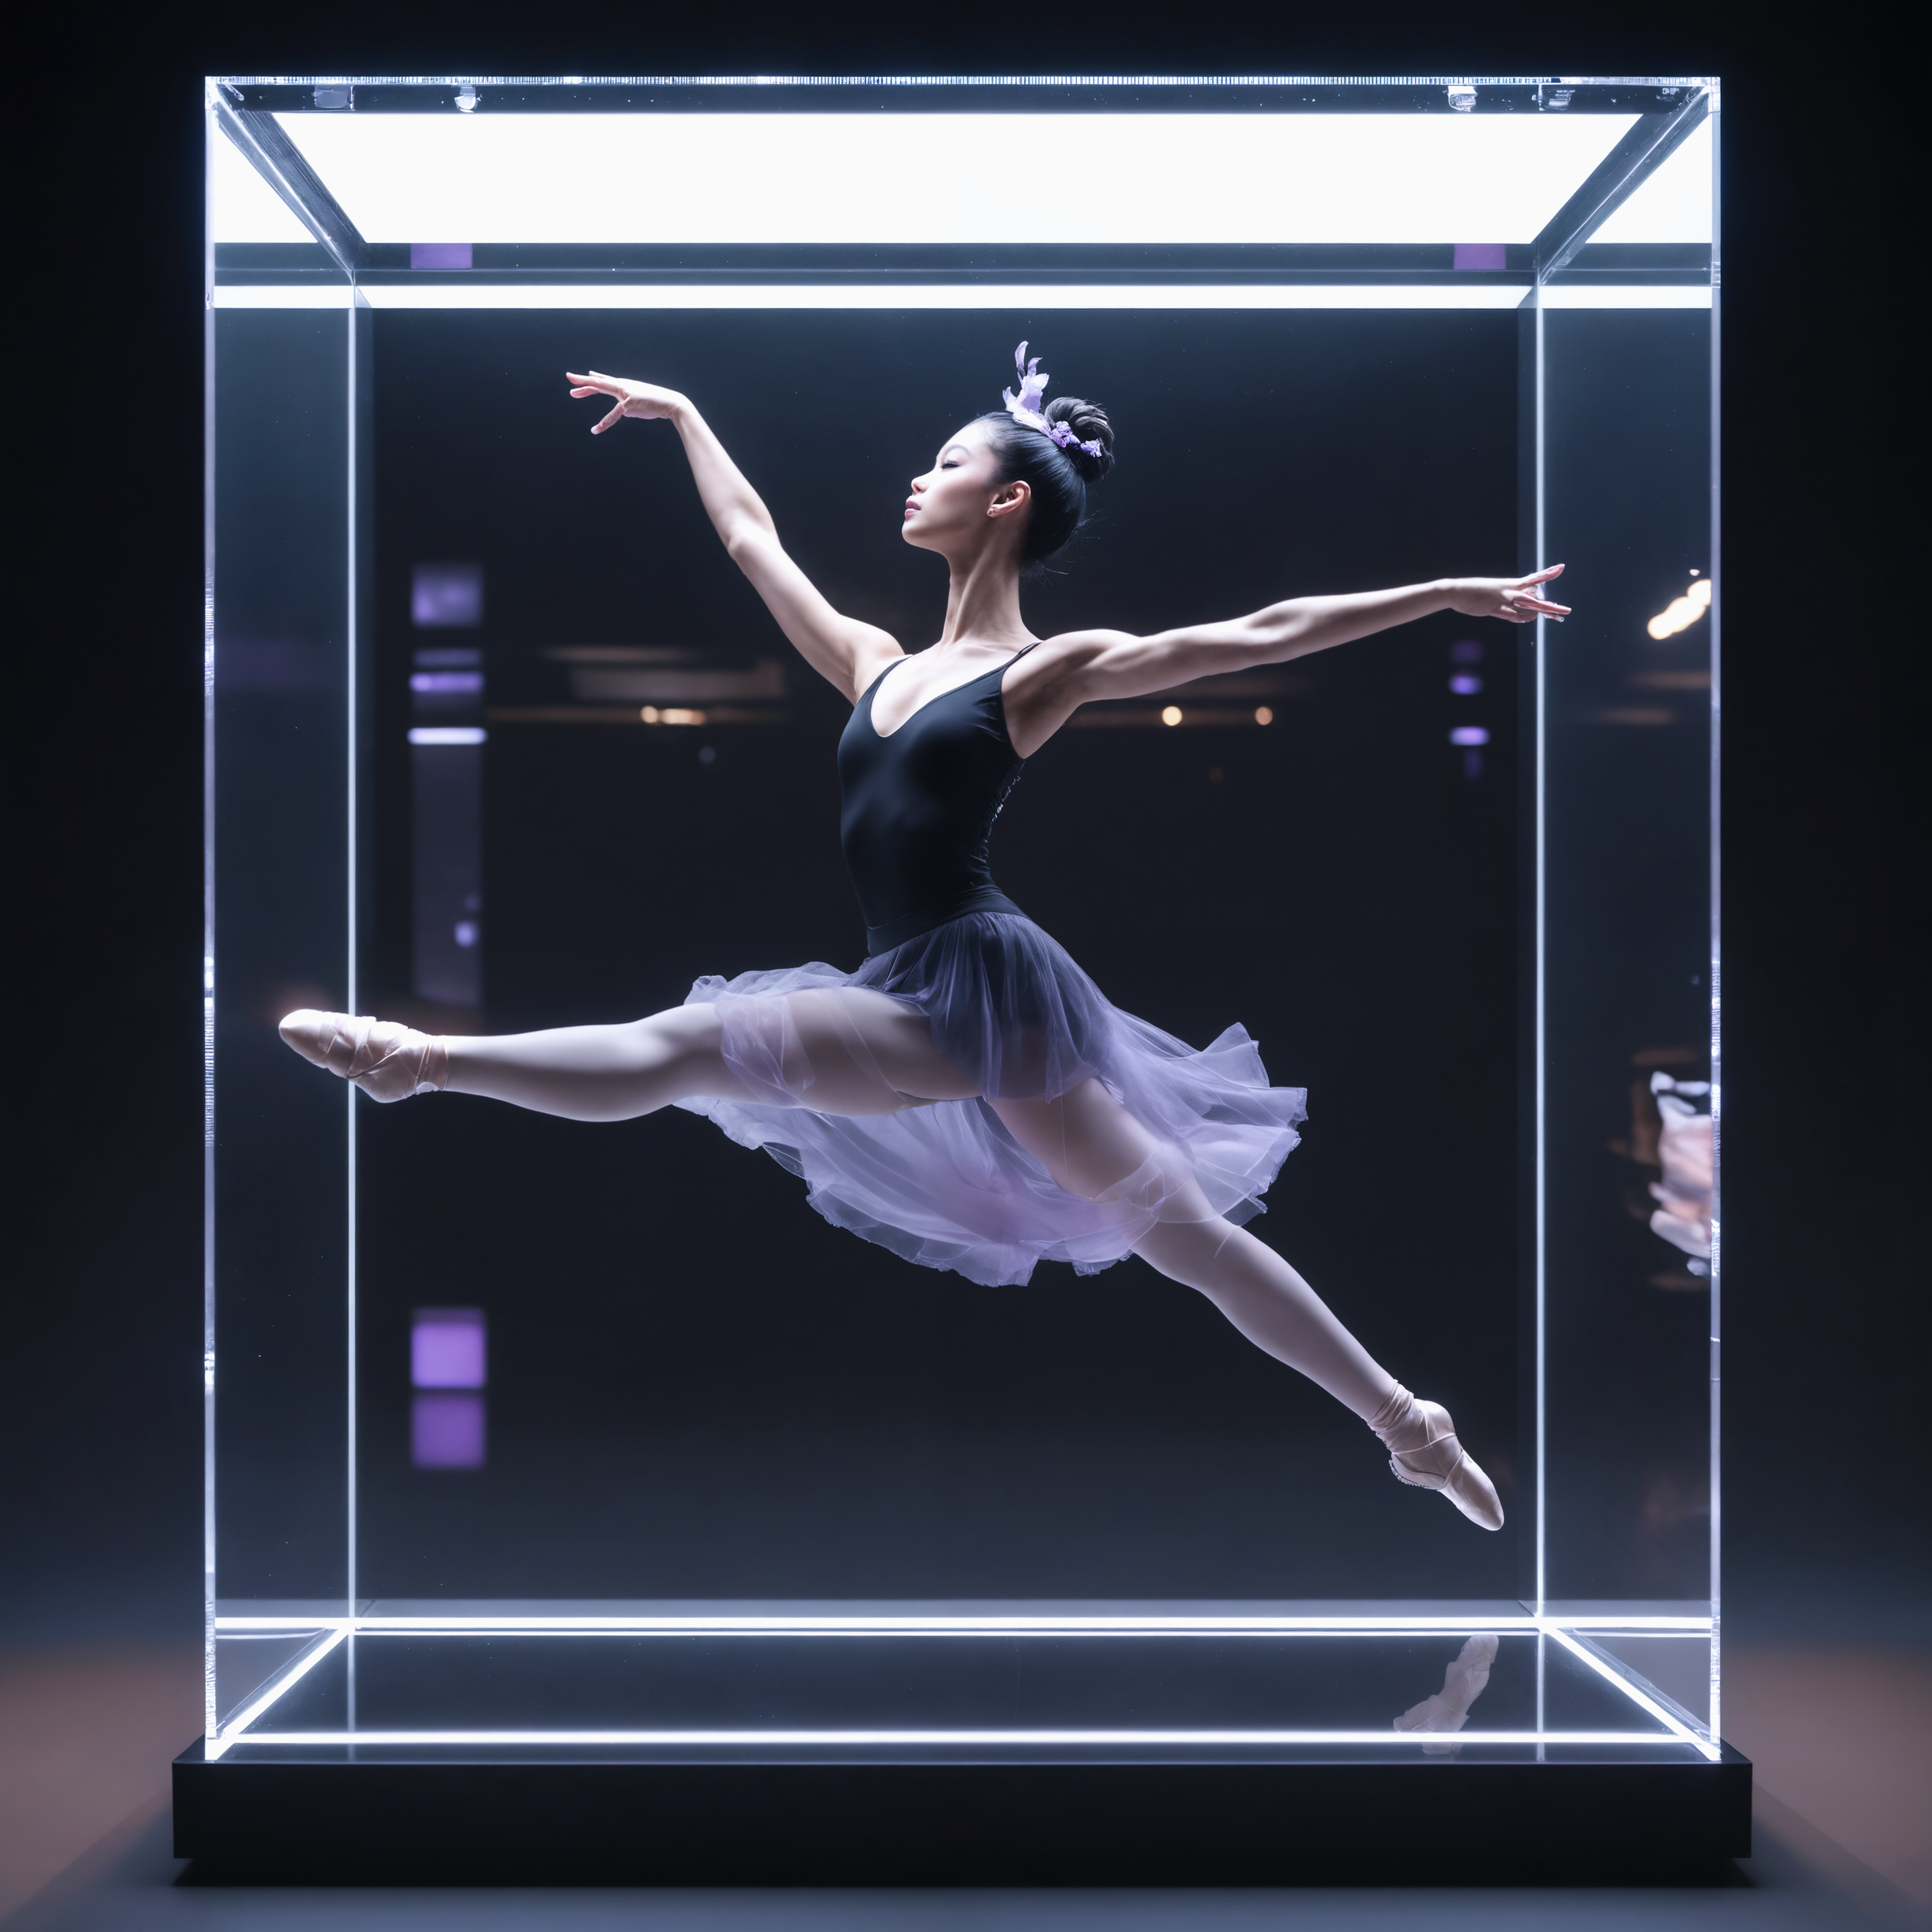
Using the final frog prompt as a base, we replaced the object with a ballerina and adjusted the material cues to match. The environment stayed the same, which made it possible to explore motion while preserving visual continuity.

Prompt: “a clear acrylic display case showcasing a dancer leaping, posing in midair, modern ballerina wearing black and grey, slim light purple tutu. The dancer floats confidently across clear glass, illuminated by a glowing LED strip from above, casting soft reflections. High-contrast shadows, minimalist black background. Studio-lit 3D scene with focus on lighting, details of the dancer, and its vivid colors.”Step 5: Calibrate for consistency across outputs
After generating several outputs with the same prompt structure, we started to see variation. Some images shifted the pose too much, others introduced distracting reflections, and a few pushed the style further than intended.
To bring things back into alignment, we made a few small adjustments:

Camera framing: “centered, full-body shot, slight low angle”
Materials: “glossy black leotard, translucent tutu, vinyl reflections”Environment: “matte black pedestal, soft spotlight, no background variation”
These iterations led to a repeatable and recognizable visual style. The ballerinas began to feel like part of the same set as the frog, unified by material, framing, and context.
You can now use these refined outputs as reference images for future generations. They work well for maintaining consistency or as control inputs with tools like ControlNet or IP-Adapter.
Step 6: Build a Gallery Gloss series
With this style established, it can be applied across a range of concepts:
Toy box collections
Character showcases
Dance pose series
Gallery-style product moodboards
All with consistent lighting, perspective, and polish.
Prompting tips
The following techniques can help stabilize your outputs and create more consistent results:
Spatial Anchors: Use phrases like “inside”, “encased in”, “within”, or “displayed inside” to position subjects within the acrylic cube.
Material Descriptions: Specify surface qualities such as “glossy,” “reflective,” “translucent,” “vinyl,” or “plush” to guide texture and finish.
Specify Environment: Add elements like “minimal black background,” “studio lighting,” “black pedestal,” and “top-down rim lighting” to keep the scene consistent across generations.
Stylistic Phrasing: Try phrases like “high-end product photography style” or “3D render with dramatic contrast” to add clarity and polish to the output.
Perspective Guidance: Use terms like “centered,” “3/4 view,” or “slightly low angle” to maintain consistent framing and composition across generations.
What’s next
Gallery Gloss is just one example of how a clear visual foundation can shape the outcome of a project. We'll be back next week with a new board, a new starting point, and a look at how it moved something from idea to execution.